
Written by SOWLE RV
November 15, 2019
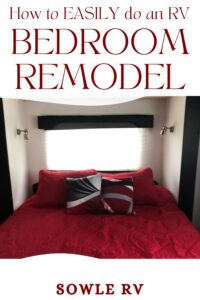
RV Bedroom Makeover in 7 Easy Steps
Remodeling our RV Bedroom was one of the easiest parts of the renovation process with our used Motorhome. In comparison to completely Replacing an RV Roof and a complete Front Cab Rehab of a Motorhome, I’m sure you can understand why! We figured we could do this RV Bedroom Makeover in 7 Easy Steps, and we were right! Here are those steps we took…By the way, all of the before and after photos are at the very end, so if you are here just to see those, scroll down! 😉
Step #1: Salvage What You Can, Trash What You Can’t
Window Treatments
There were two sets of day/night shades that were in good shape. We saved those and reused them.
Mattress
We just tossed the mattress in the trash! Didn’t even give THAT a second thought! We just can’t reuse a mattress. Yuck!
Cabinets
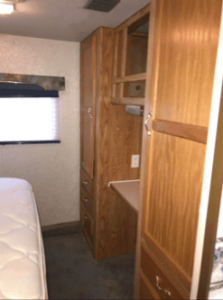
Fortunately, the cabinets were in good shape, so we were able to keep them. Unfortunately, they had a dull, wood look with golden brass hardware. Very outdated (see photo below).
Ceiling Fabric
There is a fabric ceiling in our Motorhome. Whose idea was THAT?!?! It had some water stains that needed addressed. You can read more about that in How to Remove Stains from RV Ceiling Fabric. It came out awesome so that was super simple!
Wood Everywhere
The bedroom had the most “wood” appearance to it, as I mentioned before. You can see that very well here…
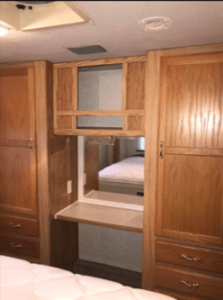
We didn’t care for that outdated look at all, so we knew we had to do something with the appearance of the cabinets. The desk area looked very outdated as well.
Shag Carpet
The floors were a blue, shag carpet so of course it had to go!
Step #2: Paint!
Paint the Walls
Once I had all the carpet out, I went ahead and painted the walls white with PPG Paint. You can purchase this on Amazon and then take it to your favorite hardware store to have any color added to it. I did have to remove the day/night shades before I could paint by the way!
Paint the Cabinets
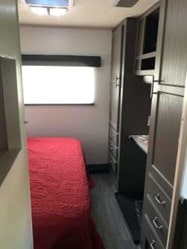
I sanded down all of the cabinets and cleaned them up with TSP All Purpose Cleaner. Next, I primed the cabinets. Finally, I followed that up with good coat of grey paint. This really started to look good.
There was trim around the slide out that had that oak wood look. We felt that was dated and went ahead and painted it black to match the upper window valance we planned to have covered in black vinyl. The desk area across from the bed had the same plastic wood trim like the front edge of the kitchen counter had, so I scuffed it really well and painted it black.
Step #3: Update Hardware
Once I re-installed the cabinet doors and drawers, I was ready to address the hardware issue. We went ahead and used the same hardware throughout the entire motorhome remodel to help it blend well. We purchased new Satin Nickel Cabinet Hardware Euro Style Bar Handles. This is what really set off the update in the bedroom.
Step #4: Replace Lights with LED Lighting
I replaced all of the 12 volt part #912 bulbs with Pure White LED Light Bulbs. This was a great decision because they won’t burn the plastic lens covers when left on for extended periods of time. My wife loves them because they add so much brighter light with an outdoor feel.
We also replaced the reading lights beside the bed with 12 Volt LED Reading Light Fixtures. This is a very inexpensive way to really update a bedroom.

Step #5: Reupholster
Window Valances
Reupholstering when you can is a much more cost-effective way to make something look brand new than actually purchasing all brand new items. That is why we decided to have all the Window Valances reupholstered throughout the motorhome. We went with a Black Vinyl for the window valances and trim, and a light shade of grey for the front bunk area.
Headboard
The headboard glues to the wall above the bed and that had to be removed and reupholstered as well. We had this done while we painted.

Step #6: Replace Flooring
I removed the nasty shag blue carpet throughout the whole bedroom. This did take a little skill because 110-volt wiring Is run along the back edge of the camper as well as under and in between the two closets in the back. The wiring was covered by plywood wrapped with carpet and long screws to hold all of it to the wall. I decided to go back with the same design but use the black vinyl that I recovered the window covering with.
When this was all complete the same vinyl flooring that was installed in the front of the motorhome was installed in the bedroom. If I do say so myself, it turned out nice!
Step #7: Add a Little Color
Bed Covering
Angie had already ordered an Embossed Over-sized Coverlet Bedspread Set in Solid Red before I had even started the bedroom remodel. She really wanted something easy to wash fast when we return home from our trips and this one works very well.
Throw Pillows
Angie also had already purchased Throw Pillow Inserts as well as Modern Abstract Red Stripes Decorative Pillow Covers for them. She says “this way I can easily change the color of the bedroom by simply changing the pillow covers”. I for one am not a fan of all these throw pillows all over the bed, but we compromised and only have 2-3 on the bed now… instead of all 4. Hahaha!
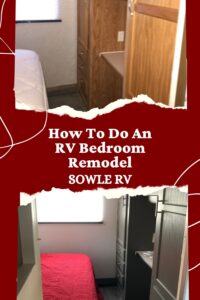
In Conclusion of RV Bedroom Makeover in 7 Easy Steps
That’s it for the RV Bedroom Makeover in 7 Easy Steps! Be sure to check out the entire Motorhome Renovation, Remodel, and Makeover at SOWLERV.com!
WOOD CABINETS IN BEDROOM BEFORE
WOOD CABINETS IN BEDROOM AFTER
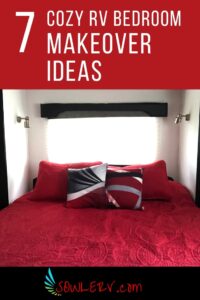
BEDROOM MAKEOVER COMPELTED!
It takes a little time and patience but if you have all your supplies ordered and ready to go, you could easily get it all done in a weekend. Especially if you have a wife pushing you to get it done so we can out and have fun RV Camping! 😉


RV Camping: Renovation, Remodel, and Makeover Articles you don’t want to miss on SOWLERV.com!
Renovation, Remodel, and Makeover, OH MY!
How to do an RV Bathroom Renovation and Remodel
How to Do an RV Bedroom Makeover in 7 Easy Steps
How to Do an RV Living Room Makeover in 8 Steps
How to Do an Easy RV Kitchen Makeover
How to Replace RV Awning Material in 5 Safe Steps
How to Remove Ugly Stains from Your RV Fabric Ceiling [with photos]
How to Remove and Replace the Flooring in Your RV Camper Trailer
Front Cab Rehab of a Motorhome
12 Steps to Replace a Destroyed RV Roof [detailed photos included]
Related Articles
![Purchasing Private RV Camping Land: 3 Important Steps to Follow from Our Experience [SOWLE Journeys of Faith]](https://sowlerv.com/wp-content/uploads/2024/05/Private-RV-Camping-Land-3-Important-Steps-to-Follow-for-Finding-and-Purchasing-From-Our-Experience-SOWLE-RV-FI-min-400x250.jpg)
Purchasing Private RV Camping Land: 3 Important Steps to Follow from Our Experience [SOWLE Journeys of Faith]
Private RV Camping Land: 3 Important Steps to Follow for Finding and Purchasing From Our Experience [SOWLE Journeys of Faith] Exploring the Benefits of Owning Your Own Private RV Camping Land Owning Your own private RV camping land offers a unique blend...

The Ultimate Guide to Finding the Perfect TV for Your RV
The Ultimate Guide to Finding the Perfect TV for Your RV Whether you just bought an RV and are needing to purchase an additional TV for the bedroom or purchased a used RV that didn’t include a TV, deciding between the numerous brands, styles, and options that are...

7 Reasons Why THIS is the Best Portable Barbecue Grill for RV Camping!
7 Reasons Why THIS is the Best Portable Barbecue Grill for RV Camping! We needed to purchase a new Portable BBQ Grill to use with our Motorhome for when we get to go RV Camping again. We researched MANY barbecue grills trying to find the best barbecue grill for RV...