
Written by SOWLE RV
November 1, 2019
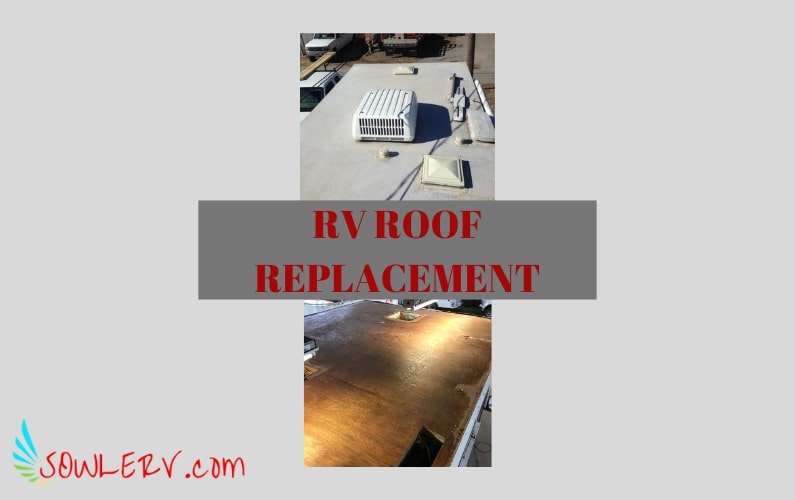
How to Replace an RV Roof
As a lot of you are aware, we bought this motorhome thinking there was minor damage in the cab. It’s the ugly side of purchasing a used RV. While doing the Front Cab Rehab of a Motorhome, I kept it indoors for a period of about a month. I never dreamed after finishing the cab area that I would be replacing an RV Roof! But that was the case. Here is How to Replace an RV Roof!
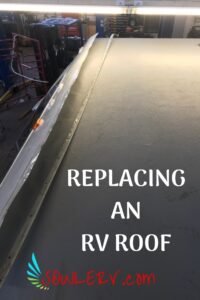
WAVY ROOF
While finishing up the cab repairs, I had to get on the roof to look at a seam when I noticed above the driver’s side towards the back, the roof looked “wavy”.

Wavy Roof
Upon further review, the edge of the roof had a hole in it that was covered up with caulking. Having the vehicle in the shop for so long allowed the laminate roof underlayment to dry out and buckle and that was how I was able to find the “waves” in the roof.
Upon even further inspection, a lot of the roof edges were caulked at one point because of excessive wear.
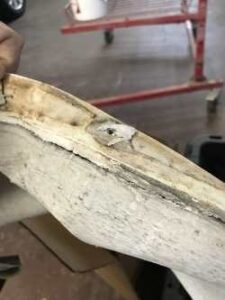
Wavy Roof Upon Further Inspection
I didn’t want to do a temporary fix and take the chance of it leaking again and destroying all we had completed inside the motorhome, so we decided to replace the entire rubber roof.
HOW TO REPLACE A RUBBER RV ROOF
Most importantly, you can’t do this project by yourself! You MUST have help. I was able to count on my Father-In-Law once again for help on replacing an RV Roof!
First we removed all of the components on the roof. This included the skylights, roof vents, air conditioner, luggage rack at the back of the motorhome, and the antenna. Additionally, I had to remove the roof edge trim (aka J Rail).
Removing the Old RV Roof
Once all of that was completed, we pulled the old roof off. This is NOT an easy task! The roof is held down to the upper laminate wood with a glue. While some pieces came off in sheets, others came off in 1”x1” sections! This took A LOT of time!
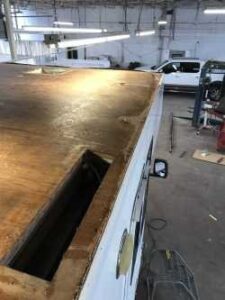
Removing the old roof
If you decide to undertake this kind of project, patience MUST be a strong suit.
Inspecting for Wood Rot
Once the rubber roof covering was off, I was able to inspect the wood roof for any rot. Thankfully I only had 2 small sections that need to be replaced.
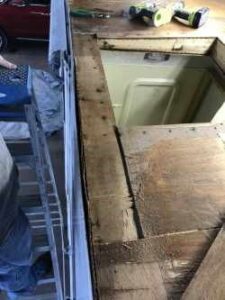
Wood Rot
We were able to use the 5mm underlayment as the new wood structure.
I used the same foam-to-wood glue to adhere the wood to the foam on the roof as I did on the Front Cab Rehab of a Motorhome.
Choosing the Best RV Roof Material
Once the wood was repaired, I had to choose which roof material I wanted to use. You basically have 2 choices for your RV. Those choices are EPDM (ethylene propylene diene monomer rubber) which is what ours originally had or TPO (Thermoplastic Polyolefin). I chose TPO because of its durability and puncture resistance.
Our motorhome is 26’ long, so we ended up getting an 8.5’ x 30’ section.
See information under “Laying the Roof” with a STRONG SUGGESTION of what YOU should get instead!
You Must Clean the RV Roof
You must clean the roof surface. It must be free of any foreign contaminants!
Spread the Glue
Next, it came time to spread the glue that came in the kit that we purchased with the roof membrane. I poured it on the roof and used a standard paint roller to coat the roof. It goes on white and when it starts to look clear, it is ready to put the roof down.
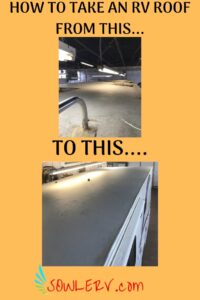
Laying the RV Roof
We chose to roll the rubber roof up and then unrolled it on the roof. This required scaffolding along the length of the motorhome or for you to move ladders every couple feet once laying the roof. We only had ladders which made it difficult and we really should have had more than just two people.
One major piece of advice I would like to give, is when you go to buy the roofing material, buy the SuperFlex RecPro RV Rubber Roof Kit 9.5’ Wide X 30′ material!
Like ours, the 8.5’ may be what you have on your motorhome, but if you don’t start it perfectly square, you will start to go off center forcing you to pull the roof back off and start over many, many times. I speak from experience with this!
Make sure you roll out all air pockets with a weighted roller while laying out the material.
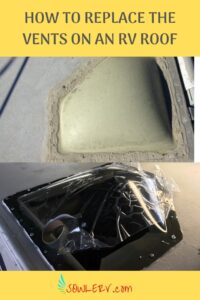
Marking Roof Openings
Once you have it laid down smoothly, mark all of your roof openings for vents, skylights, roof vents, air conditioner(s), and the antenna.
At this time, you can cut out your openings, (making sure you don’t cut them flush to the opening) because you want them to fold into the opening cut-out.
Reinstalling the J Rail
Now that the roof is laid down and the openings cut out, you can start to reinstall the J Rail. If you want to follow the manufacturers guidelines, you can use Butyl Tape. I don’t care for the failure rate of the tape, so I chose to use the AK Fix Universal Joint Sealer as the sealant. This is the same sealant that I used on the Cab for the corner moldings (see Upper Cab Rehab article again).
The Seam Binders
Now that you have the side trim installed, you can put the front and rear transition seam binders on. This is where the rubber roof meets the aluminum. Once again, I would suggest using the AK Fix Universal Joint Sealer between the 2 panels underneath the seam binders.
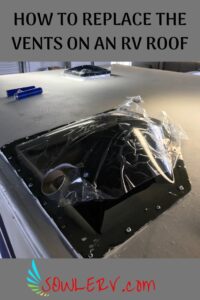
Reinstalling RV Roof Components
Next, reinstall all your roof components, making sure to seal them with AK Fix Universal Joint Sealer or a similar product!
Sealing
Now that everything is back on the roof, you need to seal around the vents with a lap joint caulking. Dicor Industries makes an excellent self-leveling lap joint caulk. This is what seals all the components to the rubber roof.
In Conclusion of How to Replace an RV Roof
That’s it for replacing an RV Roof! It’s very time consuming and not an easy project by any means. It’s also very costly. However, if you can do it yourself or with help, like I had from my Father-In-Law thankfully, it can save you thousands from having it installed by someone else!


RV Camping: Renovation, Remodel, and Makeover Articles you don’t want to miss on SOWLERV.com!
Renovation, Remodel, and Makeover, OH MY!
How to do an RV Bathroom Renovation and Remodel
How to Do an RV Bedroom Makeover in 7 Easy Steps
How to Do an RV Living Room Makeover in 8 Steps
How to Do an Easy RV Kitchen Makeover
How to Replace RV Awning Material in 5 Safe Steps
How to Remove Ugly Stains from Your RV Fabric Ceiling [with photos]
How to Remove and Replace the Flooring in Your RV Camper Trailer
Front Cab Rehab of a Motorhome
12 Steps to Replace a Destroyed RV Roof [detailed photos included]
Related Articles
![Purchasing Private RV Camping Land: 3 Important Steps to Follow from Our Experience [SOWLE Journeys of Faith]](https://sowlerv.com/wp-content/uploads/2024/05/Private-RV-Camping-Land-3-Important-Steps-to-Follow-for-Finding-and-Purchasing-From-Our-Experience-SOWLE-RV-FI-min-400x250.jpg)
Purchasing Private RV Camping Land: 3 Important Steps to Follow from Our Experience [SOWLE Journeys of Faith]
Private RV Camping Land: 3 Important Steps to Follow for Finding and Purchasing From Our Experience [SOWLE Journeys of Faith] Exploring the Benefits of Owning Your Own Private RV Camping Land Owning Your own private RV camping land offers a unique blend...

The Ultimate Guide to Finding the Perfect TV for Your RV
The Ultimate Guide to Finding the Perfect TV for Your RV Whether you just bought an RV and are needing to purchase an additional TV for the bedroom or purchased a used RV that didn’t include a TV, deciding between the numerous brands, styles, and options that are...

7 Reasons Why THIS is the Best Portable Barbecue Grill for RV Camping!
7 Reasons Why THIS is the Best Portable Barbecue Grill for RV Camping! We needed to purchase a new Portable BBQ Grill to use with our Motorhome for when we get to go RV Camping again. We researched MANY barbecue grills trying to find the best barbecue grill for RV...