
Written by SOWLE RV
October 1, 2019
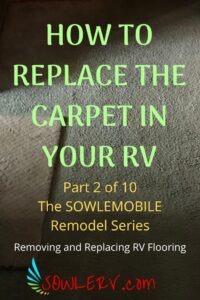
How to Remove and Replace RV Flooring
This was my thought process when starting: First of all, I thought we had some condensation and water stains from a previous leak. I anticipated just doing some updates and a couple renovations. Above all, the first thing was removing all the dirty carpet, the nasty couch, and seeing what I had to work with as a base. Furthermore, was the floor in the RV good? Therefore, I had to do all of that and then I could begin the process of Removing and Replacing RV Flooring. Here is our example of How to Remove and Replace RV Flooring.
Staples, Staples, and MORE STAPLES
However, what I wasn’t prepared for was in the entryway. The carpet had ten thousand staples in intricate corners, with ten thousand more staples on the edges and steps! So, prepare to spend many HOURS removing staples!
CARPET REMOVED IN LIVING ROOM, NOW WHAT?
Once I got the carpet removed from the living room and slide out, there was still linoleum that ran halfway into the living room under the carpet. I knew I was removing all of it. Most noteworthy, you must cut it out with a razor knife because I had no intentions on removing cabinets to remove the linoleum. Similarly, you must be careful not to cut the cabinets this way because they are particle board wrapped with a wood wallpaper (like contact paper).
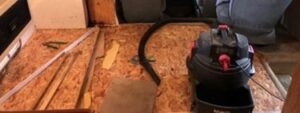
Cutting around doorways and corners are very time consuming and intricate, but if you take your time, the result will be good!

THE BATHROOM FLOORING
Next, comes the bathroom. They put carpet around the toilet because of all the angles around the shower and raised toilet. Isn’t THAT a beautiful sight? LOL
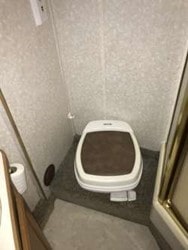
Unfortunately, carpet around a toilet, pardon the pun, is a “piss poor” design. So, we removed all that and replaced it.
THE BEDROOM FLOORING
In the rear of the RV, is the bedroom. Here they also had carpet and we had to remove that as well. More staples. More time. There is also wiring that runs around the edges of the floor. It is boxed in with quarter inch plywood that they ran carpet on as well. More time…
We used the old pieces of wood for templates and used vinyl material to wrap the wood to cover the wiring. We will get into much more of THAT in later articles. The floor throughout, we used Laminated Flooring from Home Depot.
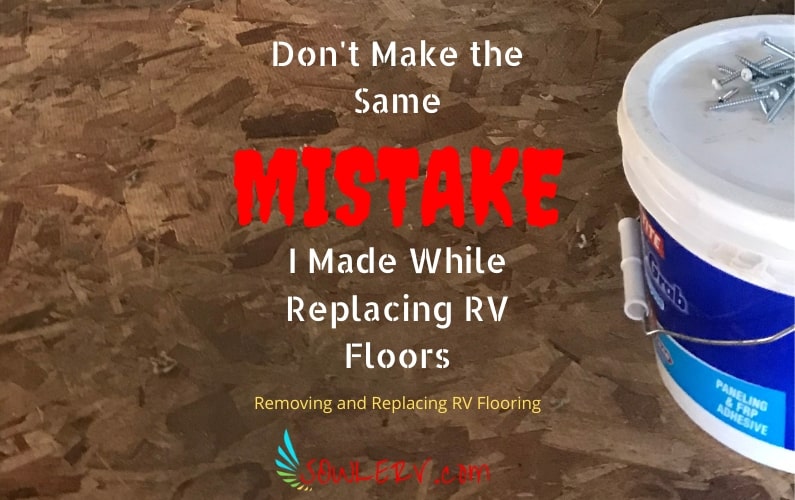
MY MISTAKE
On this project, I made the mistake of thinking it should be one solid piece of laminated throughout. This was REALLY hard to cut all the angles correctly and get it laid down throughout the entire RV. I spent 3 days getting it to what I thought was correct.
After sealing the floor down, and caulking around all the edges, it looked great!
Unfortunately, our first trip out, I realized that I didn’t plan on the RV not being perfectly level when I laid the floor. I didn’t expect the expansion and contraction of the floor due to temperature and humidity. The vinyl flooring wrinkled in between the living room, hallway, and around the door openings.
THE FIX TO MY MISTAKE
What I ended up having to do to solve the problems is what I should have done from the start. I went back and installed the flooring individually in each room with a seam at each entryway.
This would have saved me 2.5 days’ worth of work in the beginning if I had done it this way to begin with. Lesson learned.
YOU DON’T HAVE TO USE QUARTER ROUND
If you don’t want to lay down quarter round in an RV (which I would suggest NOT doing), you can buy colored caulking to match your flooring. At least you can come pretty close to match it anyway. This works very well to hide the 1/8” gap you need to lay down the flooring.
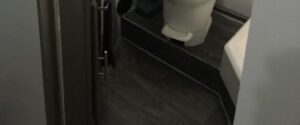
THE CAB AREA FLOORING
To finish up the vinyl flooring looked good, however, the cab area was still carpeted. Unfortunately, 18 years of sun and weathering had the carpet faded and discolored. In some areas it was completely “whited out”. We thought about replacing the carpet, but that would require removing all of the seats and trying to form fit around the “engine doghouse” and that would be a hassle and expensive.
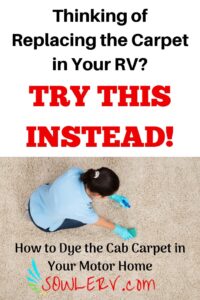
So, after inspecting the carpeting and seeing that it was in really good shape, I started looking online for fabric sprays that my wife, Angie, suggested we try. RIT DYE is the product we ended up using.

Conclusion of How to Remove and Replace RV Flooring
We decided we didn’t want the blue colored carpet anymore since we were changing the color theme throughout, so we went with black carpet dye. We spent 30 minutes each over the next 2 days spraying the carpet with the dye we made up and scrub brush to rub it in. The end result was well worth it!


RV Camping: Renovation, Remodel, and Makeover Articles you don’t want to miss on SOWLERV.com!
Renovation, Remodel, and Makeover, OH MY!
How to do an RV Bathroom Renovation and Remodel
How to Do an RV Bedroom Makeover in 7 Easy Steps
How to Do an RV Living Room Makeover in 8 Steps
How to Do an Easy RV Kitchen Makeover
How to Replace RV Awning Material in 5 Safe Steps
How to Remove Ugly Stains from Your RV Fabric Ceiling [with photos]
How to Remove and Replace the Flooring in Your RV Camper Trailer
Front Cab Rehab of a Motorhome
12 Steps to Replace a Destroyed RV Roof [detailed photos included]
Related Articles
![Purchasing Private RV Camping Land: 3 Important Steps to Follow from Our Experience [SOWLE Journeys of Faith]](https://sowlerv.com/wp-content/uploads/2024/05/Private-RV-Camping-Land-3-Important-Steps-to-Follow-for-Finding-and-Purchasing-From-Our-Experience-SOWLE-RV-FI-min-400x250.jpg)
Purchasing Private RV Camping Land: 3 Important Steps to Follow from Our Experience [SOWLE Journeys of Faith]
Private RV Camping Land: 3 Important Steps to Follow for Finding and Purchasing From Our Experience [SOWLE Journeys of Faith] Exploring the Benefits of Owning Your Own Private RV Camping Land Owning Your own private RV camping land offers a unique blend...
The Ultimate Guide to Finding the Perfect TV for Your RV
The Ultimate Guide to Finding the Perfect TV for Your RV Whether you just bought an RV and are needing to purchase an additional TV for the bedroom or purchased a used RV that didn’t include a TV, deciding between the numerous brands, styles, and options that are...

7 Reasons Why THIS is the Best Portable Barbecue Grill for RV Camping!
7 Reasons Why THIS is the Best Portable Barbecue Grill for RV Camping! We needed to purchase a new Portable BBQ Grill to use with our Motorhome for when we get to go RV Camping again. We researched MANY barbecue grills trying to find the best barbecue grill for RV...