
Written by SOWLE RV
September 30, 2019
10 Tips on How to Protect Your RV with Proper Annual Maintenance
I am sure you have heard, either from the Dealer you purchased your RV from or from other RV’ers, that it is very important to keep up on the maintenance of your RV. If you haven’t heard that from anyone else, I know you have if you follow SOWLE RV! We even have a few checklists we are going to share with you that are a simple and easy way to remember how to protect your RV with proper maintenance.
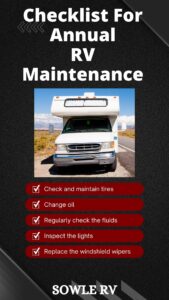
RV Maintenance
Creating a scheduled time to do proper maintenance on your RV will help you out each year. Make sure you schedule it BEFORE the RV camping season begins. It is also important not to forget to do it at the END of the RV camping season too before cold weather arrives!
It can potentially save you the frustration of having something go wrong while traveling. Also, it can save you from winter weather related issues. Most importantly, it will save you money down the road!
Here is your free printable SOWLE RV’s RV Maintenance Checklist for you to keep on hand!
Protect Your RV with Proper Annual Preventable Maintenance Tip #1: RV Trial Run
We discuss the importance of doing a Trial Run in our Article 5 Essential Steps in Planning an Epic RV Camping Trip. It will tell you all about our first Trial Run out with our new to us Motor Home!
We did have minor (and major) issues within our first Trial Run with brand new RV’s as well as used, so don’t think that it is just because you purchased a new(er) RV that everything is going to work perfectly like we assumed.
Like we have discussed before, doing a Trial Run before your first trip in a used OR new RV can save you time and frustration during your main planned travels.
Get Your FREE printable Trial Run Checklist for you to keep on hand.
If you’re interested in more information about SOWLE RV’s Travel Binder, you can access that in the article SOWLE As You Goal Travel Binder.
Protect Your RV with Proper Annual Preventable Maintenance Tip #2: Water Heater Tank Anode Rod
Be sure to check your Hot Water Heater Tank Anode Rod. If your tank is aluminum this does not apply to you.
This rod protects your hot water heater tank from corroding by having a softer metal than your hot water tank.
This rod will last around 1-2 years depending on usage and water conditions.
It is installed at the bottom of your suburban hot water heater.
It is also the lowest point on the hot water heater for draining and winterizing.
When installing the Anode Rod, it is extremely helpful to apply Teflon tape to the threads.
The Hex Nut on the hot water heater tank Anode Rod is 1 1/8”. This is handy to know so you can keep the correct socket in your RV Tool Kit.
Flushing a hot water heater tank when it has calcium build-up and what not to do!
If you have a suburban hot water heater with a steel tank, it will have a metal Anode Rod designed to corrode in place of the tank itself. Because of the corrosion and putting a flame to the tank, calcium sediments buildup in the tank of the heater.
It is a good idea to flush these sediments out. On our Flagstaff Travel Trailer, there was a lot of sediment in the hot water heater.
After pulling the Anode Rod, I thought I could flush it out by running water to the hot water heater. Unfortunately, this was not getting enough out so I had the BRIGHT IDEA of putting the Anode Rod in with just a couple of threads to build up more water and little pressure to blow it out. What I did not foresee was how much pressure could build up in the system.
After allowing it to fill for a minute or two, I started to take the Anode Rod back out. When it got to the last part of the threads, it blew the Anode Rod about 10-15 feet past me while I got a complete unintended shower. Needless to say, I was fortunate that I never had the hot water heater turned on, or else I would have gotten severely burned.
From that experience, I learned that to clean your hot water tank, you need to make sure you get a round, soft bristle brush that you can put in the opening of the hot water tank and allow water to flow normally and use your brush. It will work much better than trying to torpedo your Anode Rod than removing it under pressure. Lesson learned for sure!
Protect Your RV with Proper Annual Preventable Maintenance Tip #3: Your Water System
Wherever your fresh city water system comes in there is usually a water strainer inline. This should be inspected, and the bowl removed to clean out any sediment that might have accumulated.
If you have inline water filtration cartridges this is also a good time to replace those.
Checking all water connections that allow for viewability is the next step in the water system check.
Make sure you are hooked up to city water or you can use your water pump if you have water on board.
Pressurize the system and look for any drips or seepage at any fitting as well as any water draining from the grey water tank.
Protect Your RV with Proper Annual Preventable Maintenance Tip #4: Roof Inspection
While inspecting the RV Roof, look at all the seams that have caulking on them from your roof all the way down to your plastic side skirts. If you see any that have cracked or separated from a surface go ahead a reseal them with Roof Sealant.
How To Avoid RV Roof Damage on a Used RV
I would like to share one of my first experiences with a new-to-us RV.
When we decided we really wanted to do more “Glamping” or at least have some nicer amenities in an RV, we purchased a Class A Motorhome. I knew very little about them at the time but thought I could rule the highways with a house on wheels!
We had a few stumbling blocks just after buying it. It had a bad fuel tank switch and we had a couple of tires blowout, but nothing catastrophic.
After that, we had a great late season run with it. When we did park it, we were able to put it beside our house for the winter which worked out well for storage.
However, this is when I learned the hardest lesson almost anyone can learn about a camper.
2 Kinds of RV Camping Trailers
There are two kinds of RV Camping Trailers; the ones that leak and ones that will eventually leak.
Unfortunately, I wasn’t familiar enough with RVs to understand that every joint, seam and window has the potential to leak. I didn’t know to inspect the roof for any kind of sealant cracking or joint expansion.
This was an older model, so it had aluminum rolled edges that mated to an EPDM rubber roof with a fiberglass front cap. The material that the roof is made from does expand and retract in different temperatures, therefore, causing the joint compound, that is meant to seal the two surfaces together, to start to crack in the middle.
Over the course of the winter, we had a lot of snow accumulated on the roof. I went to the camper to get a blanket that we stored in an overhead pull-down bed. When I did, there appeared to be a water stain on the sheets.
Don’t Procrastinate
I wish someone at that time would have told me not to procrastinate and get on the roof to double check every square inch for any kind of leak. However, instead, I allowed myself to be in denial that nothing was wrong or even could be damaged after all it was just a little water, right?
Well, much to my dismay, I found out after the snow and ice melted, the front bed was completely soaked and the water had kept freezing and thawing throughout the winter. It had done significant water damage to the roof of the RV. This could have been avoided if I had inspected and sealed the roof appropriately.
Long story short. Get up and check your roof frequently! One time in the beginning and again at the end of the season is not enough. I repeat twice a year is NOT ENOUGH!
Do It Yourself or Take It to A Dealer?
So, “Do It Yourself or Take it to a Dealer?” This is a question every person must ask themselves.
Do It Yourself
If you have good access to the roof of your camper, can physically climb up on the roof, and do an inspection, do it frequently and often. Once a month seems like a lot, but you will thank yourself when you catch something starting to go wrong sooner than later.
Take It to A Dealer
If your only option is to go to a dealer and have it inspected, do it. Find out what they charge. Also, find out what is included in the charges. Most dealerships will have minimal fees for easy inspection items like a roof wellbeing check. Just make sure what you are asking for is exactly what they are looking into. Don’t be afraid to ask questions.
If you ask them to check the roof for damage, they might only look for damage from an outside source like a tree limb. As I said earlier, make sure you let them know exactly what you are asking for.
I would ask that they inspect the roof for obvious damage from an outside source like tree impacts or hail damage to roof vents. Also, any areas where joint compounds have been used to seal a seam or vent pipes.
Please just take it from someone who learned the hard way. One of the easiest things you can do to protect your investment is to make sure it is sealed from leaks. There is never a small leak on a camper!!!
Here are our 6 suggestions to avoid damaging a roof that could cause a water leak:
- When choosing a campsite, avoid overhanging tress that could potentially scrap or cut the roof
- Clear any debris that is on the roof
- While driving, try to avoid side streets that have a lot of trees that overhang and can damage your roof
- While walking on your RV Roof, keep in mind you have braces that are generally 16” apart. Try to displace your weight on those areas.
- Maintenance of generally inspecting your RV Roof and cleaning it is the best way to avoid having damage done due to weather conditions.
- Purchasing a properly fitted RV Cover that is suited for YOUR type of weather conditions is an excellent way to prolong the life of your RV Roof.
Protect Your RV with Proper Annual Preventable Maintenance Tip #5: Tires
Inspect your RV tires for any signs of a possible failure including knots in the sidewall uneven tread wear, a tire with little to no tread left dry rotted tires or valve stem rotting away. If you see a rim that is Scrapped up or bent take it to a tire shop and make sure it is not out of round or out of balance.
Last year we decided to take our Flagstaff RV (weighing 9,600 lbs. dry) fully loaded to a nearby lake and campground. Every trip so far has gone off without a problem.
Nothing seemed out of the usual when we headed out. When I got on the highway, I felt like it was a windier day than usual but when looking around it really did not appear to be. The trees were not swaying, the semi-trucks were doing their typical 75 MPH on the highway, but for myself, 55 MPH was a little bit of a “white knuckle drive”.
Honestly, unlike most trips we take, the thought of checking the RV tire pressure on our RV before we left home just slipped my mind.
Just Take It Slow
At first, I just figured I would keep my speed slow. No big deal, I do not rush when pulling an RV anyway. About the 3rd semi-truck that went by, it almost seemed like the RV was towing worse or swaying more than usual.
After 20 minutes into the drive, I was really questioning myself and knew I was going to have to pull over and inspect the trailer because something just did not feel right. Still at this point, it didn’t cross my mind about checking the RV tire pressure before we set out.
Tire Inspection
I pulled over in a small town at a gas station and got out and inspected the truck, trailer, and weight distribution hitch to ensure everything was set up properly. Everything looked normal. Nothing was out of place. I then realized I did not check tire pressure before we got on the road!
The Importance of Having an Air Compressor in Your Vehicle
To make sure we are as safe as possible, regarding tire pressure, I bought a mini air compressor that will charge the tires up to 120 psi. It also has a built-in pressure gauge. The truck was at 55 psi on almost every tire, which were brand new tires, but they left them underinflated for a “smoother ride”.
I used the compressor to start filling the tires. I got the left rear up to 70 psi and then started on the left front. Realizing that it was going to take a long time to get all the tires properly inflated (because they were so low), I drove around the gas station and found their air stand. I figured this would be the easiest way to air up the tires to 80 psi and get back on the road.
The Familiar Feeling of Nervousness
I headed out of town towards the lake. Everything felt fine, then I got back onto the highway. I got up to around 55-60 MPH, everything seemed normal again. This highway I was on is a 2-lane, undivided road. I got it back up to about 65 MPH, then oncoming car went by.
I got that “familiar feeling of nervousness” when the trailer swayed more than normal. Realizing that something was still “off” I slowed it back done, had to drive another 10 minutes until I reached our destination.
Tire Gauge for Higher Pressure
At the local gas station, they have a wide turnaround. I was able to pull through and put the trailer up towards the air they have on the side of the building. I went inside and bought a tire gauge for higher pressure. Went out and checked the tire pressure on the RV and they were all at 60 lbs.
It was then that I felt like an idiot for not double checking them earlier when I realized the truck tires were so low. Prevention would have kept me from losing a bit of confidence in the tow vehicle and RV Trailer by just simply checking the tires before heading out for this trip which I KNOW I am supposed to do!
We had a wonderful time at the lake after this fiasco and the drive home WAS WINDY, however, Mark had no problems running 65 MPH with proper inflation of the tires. Proper maintenance on all RV’s (new and older) is so very important in protecting your RV and family Skipping steps before heading out can result in big problems. Again, learn from me, don’t skip those steps!
Protect Your RV with Proper Annual Preventable Maintenance Tip #6: Batteries
If you are like me, I only seem to get a couple of years out of the Maintenance free deep cycle batteries I have on my units. But keeping them charged is crucial for battery lifespan.
When a battery gets discharged it will allow the electrolytes to freeze just like water at 32 degrees. A fully charged battery will not freeze until the temps get to -30 to -50 degrees. Keeping the batteries fully charged is your best bet in preventative maintenance.
I have purchased a solar powered charger to keep the battery up on our motorhome. If you keep your RV stored at another location than your home, you might find it better to remove them and bring them home to keep them from being drained and freezing in the winter months.

Protect Your RV with Proper Annual Preventable Maintenance Tip #7: RV Brakes
For most of us we have no desire to tear apart the brake system on our campers and that is ok. Most likely they are working fine. That does not mean you should not do preventative maintenance on them. If they work fine, what could be wrong. That is what we are going to talk about now.
If your wheels have an excessive amount of brown or black dust on them that is usually a sign of brake dust. This can be a normal build up over a longer period, but if it comes on suddenly it may be time to take it in for service of if you are handy time for some elbow grease.
On the back side of your axles there is wiring that goes to your electric brakes. This wiring is somewhat exposed and can be eaten by rodents. Caught by debris or a limb you run over so look and make sure it is not damaged. While inspecting brakes take the time to make sure you do not have any grease coming from the back or the front side of your axle hubs.
If you have a level surface and a bottle jack you can lift the axle of the ground and rotate the tire to make sure you do not have anything dragging or a wheel bearing making noise.
This step should only be done after properly stabilizing the RV and chalking the wheels, so you do not get unintended movement when you lift the wheel off the ground.
The last thing I want to mention is check that your lug nuts are properly torque down.
After removing an aluminum wheel, they say you should double check the lug nuts after 40-50 miles to make sure the wheel is seating properly.
Protect Your RV with Proper Annual Preventable Maintenance Tip #8: Holding Tanks
Checking your holding tank levels is as easy as pushing a button. But what if the tank reads half full when empty? It may be time to fill your tank with an additive to get your sensors cleaned.
What would you do if after a long weekend you headed to the dump station to find out your black water tank valve will not open or worse yet the threaded rod on the blade valve broke off after pulling on it?
One way or another this will turn into a dirty job for someone!
If you test these valves at the beginning of the season you might prevent yourself from being in this situation. Keep in mind no matter how well you think you flushed your black water tank there is always a chance you will have residual elements left over.
Never open your black water tank valve without a container to catch and contain the possible residuals.
Protect Your RV with Proper Annual Preventable Maintenance Tip #9: Slide-Outs
Run them in and out lubricating anything that the Owner’s Manual calls for. Make sure there is not any debris on the tops of the slide-outs as this could cause a leak or tear in the roof material.
Make sure to condition the rubber seals with a condition product such as Aerospace 303 that cleans and conditions. This will help keep your seals from binding on the surface of the slide-outs that can lead to added stress on the slide-out motors and guide rails.
If you see the slide out is not sealing against the RV correctly it would be a good time to schedule it in for service.
Protect Your RV with Proper Annual Preventable Maintenance Tip #10: Leaky RV
Here are 5 Signs of an RV Leak to Watch Out For
- Staining around window frames, roof edges
- Spongy floor
- Dampness in carpeted areas or wrinkling/blistering of wallpaper
- Outer wall delamination
- Rust coming from under moldings
Conclusion of the 10 Tips for How to Protect Your RV with Proper Annual Maintenance
We hope these 10 tips for How to Protect Your RV with Proper Annual Maintenance have helped you feel more prepared for what maintenance you need to do and how to do it. We mentioned a few items within this article that may be helpful in your situation with maintenance activities. Here are the links to those products we discussed:
Hot Water Heater Tank Anode Rod
Sensor and Tank Cleaner Additive
Round, Soft Bristle Brush for the opening of the hot water tank
SOWLE RV’s RV Maintenance Checklist
SOWLE RV’s SOWLE as You G.O.A.L. FREE Printables Travel Binder Pages!


Related Articles
![Purchasing Private RV Camping Land: 3 Important Steps to Follow from Our Experience [SOWLE Journeys of Faith]](https://sowlerv.com/wp-content/uploads/2024/05/Private-RV-Camping-Land-3-Important-Steps-to-Follow-for-Finding-and-Purchasing-From-Our-Experience-SOWLE-RV-FI-min-400x250.jpg)
Purchasing Private RV Camping Land: 3 Important Steps to Follow from Our Experience [SOWLE Journeys of Faith]
Private RV Camping Land: 3 Important Steps to Follow for Finding and Purchasing From Our Experience [SOWLE Journeys of Faith] Exploring the Benefits of Owning Your Own Private RV Camping Land Owning Your own private RV camping land offers a unique blend...

The Ultimate Guide to Finding the Perfect TV for Your RV
The Ultimate Guide to Finding the Perfect TV for Your RV Whether you just bought an RV and are needing to purchase an additional TV for the bedroom or purchased a used RV that didn’t include a TV, deciding between the numerous brands, styles, and options that are...
7 Reasons Why THIS is the Best Portable Barbecue Grill for RV Camping!
7 Reasons Why THIS is the Best Portable Barbecue Grill for RV Camping! We needed to purchase a new Portable BBQ Grill to use with our Motorhome for when we get to go RV Camping again. We researched MANY barbecue grills trying to find the best barbecue grill for RV...